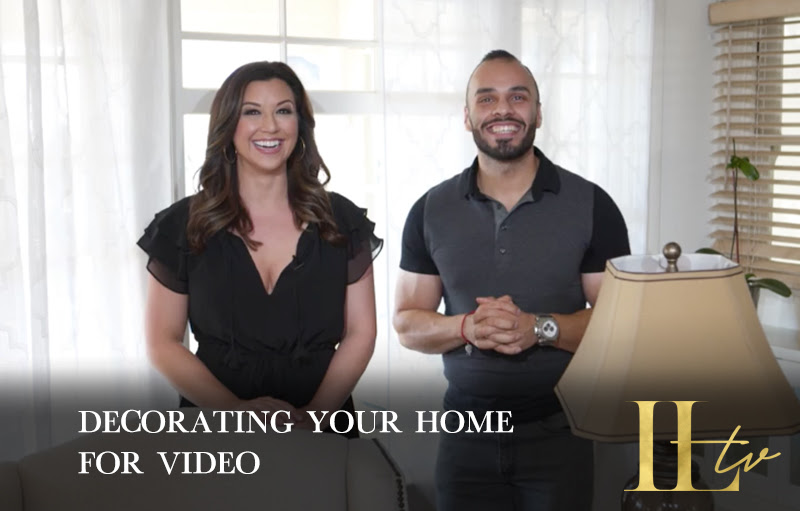
Hello! It’s Keri from Inspired Living, and welcome to my home! Today, I will give you a sneak peek into how we shoot our ILTV videos, and share how YOU can create the perfect set for your home or office. This is a question that I get asked all the time, so I wanted to take this opportunity to talk about how to set up your home, what camera and lighting equipment to use, and some “do’s and don’ts” to make sure you are showing up as a pro on camera!
These things took me a long time to learn, allow me to save you a lot of time and energy! The first tip is to choose a space in your home or office that represents your brand. Choose a place that allows you to show up and feel comfortable. When people watch ILTV, I want them to feel like they are in my home, sitting next to me on my couch. By creating that comfortability with my viewers, it allows another level of connection to transpire. For your every week videos that I hope you’re putting out to your community *HINT HINT*, it doesn’t have to be a big set. You want it to feel intimate, to be a space that truly reflects who you are, and the message you want to convey.
No matter how beautiful my set is, none of my videos would look the way they do without the work of my fabulous camera man, Erick, who I have been working with for years!
Now I want you all to remember, I didn’t start out with a crew! For a very long time, I shot my own videos with my own camera, with not great lighting and sound. It wasn’t until my business grew to a certain level, that I began to invest more into my production.
If you’re not quite at the point where you can invest in a ton of equipment, that is OK! Here are some tips you can use to make your current setup the highest quality, most professional looking content possible!
When you are looking for your equipment, there are a lot of options out there, and there are a variety of products that you can use that will give you a great end result! If you are just starting out, your smartphone, in combination with good lighting, a tripod, and a microphone, is going to give you a great first product!
* PRO TIP * No matter what camera you are using, make sure that it has an external microphone import. There are many DSLR cameras that do not have this feature, so make sure you look into that before purchasing. This external microphone import is imperative for having the clear sound that you need to convey your message in a clear, professional, high quality manner!
Lighting and sound are the most important things.
Let’s talk lighting. Natural light is key! Especially before you are at the stage where you are bringing in artificial lighting.The most natural light possible will give you the most professional looking results. Select a location that has multiple natural light sources, open all of your blinds, and choose a time of day to shoot when the natural light is the best in your specific space. Even when you begin to bring in LED lights to supplement your natural lighting, the goal is to eliminate any shadows. You never want the light source to be behind you. You want to “find the light”, and always have the light source, whether it’s natural, or artificial, in front of you.
For external microphones, they do not need to be expensive. Erick’s recommendation is to go for one in the $30-40 range. Although you could get one for $10, you get what you pay for. The extra money is well worth the jump in audio quality.
If all of this information is a bit overwhelming in this moment, you can download the Be Studio Ready Guide, for a complete list of my equipment recommendations. The best part is you can even purchase them right through this link! I am here to make this process as easy as possible for you!
Now that you’ve got your equipment setup, where do you shoot? One of the most important things to look for when choosing a space is to pick a location that not only has good natural light, but also has a good depth of field. What I mean by this is not shooting against a flat wall. The reason behind this is to keep people’s attention. By creating dimension, you are creating a more appealing, inviting look.
I absolutely cannot wait to see the videos you all create using the new knowledge you have gained today! Leave any questions or comments in the comment section below! I want to hear how you have connected with this information, and what you think is going to make the biggest difference in your videos!
Dream it. Live it. BE it!